.png?width=5836&height=1234&name=logo%20(1).png "Morta")

Signing up to Morta
Signing Up to Morta is extremely straightforward. Users can choose their Microsoft or Google accounts or alternatively enter an email and set a password after agreeing on terms and conditions. Kindly follow the simple steps below. You will be receiving an email to verify your email address and once you click on the verification url, you will be able to login to your account successfully.
FIg 1: Confirm reading and understanding of Terms of Service and Privacy Policy then click Sign Up with Email

Fig 2: Supply your details and make sure you adhere to password requirements.
Managing user permissions with Morta
To manage users and permissions with Morta, you have to head over to the settings page --> Permissions, as shown in the image below. As an admin and/or owner of the project you can Add a project Member, invite users who are not currently on the Morta platform, remove users or upgrade members to admins. Only the project owner can remove other admins.
Moreover, it should be noted that Morta follows a Tag-based approach to permissions, thereby giving organisations a high degree of control and customizability (eg. You can permission by organisation, role, location, level of authority, etc)
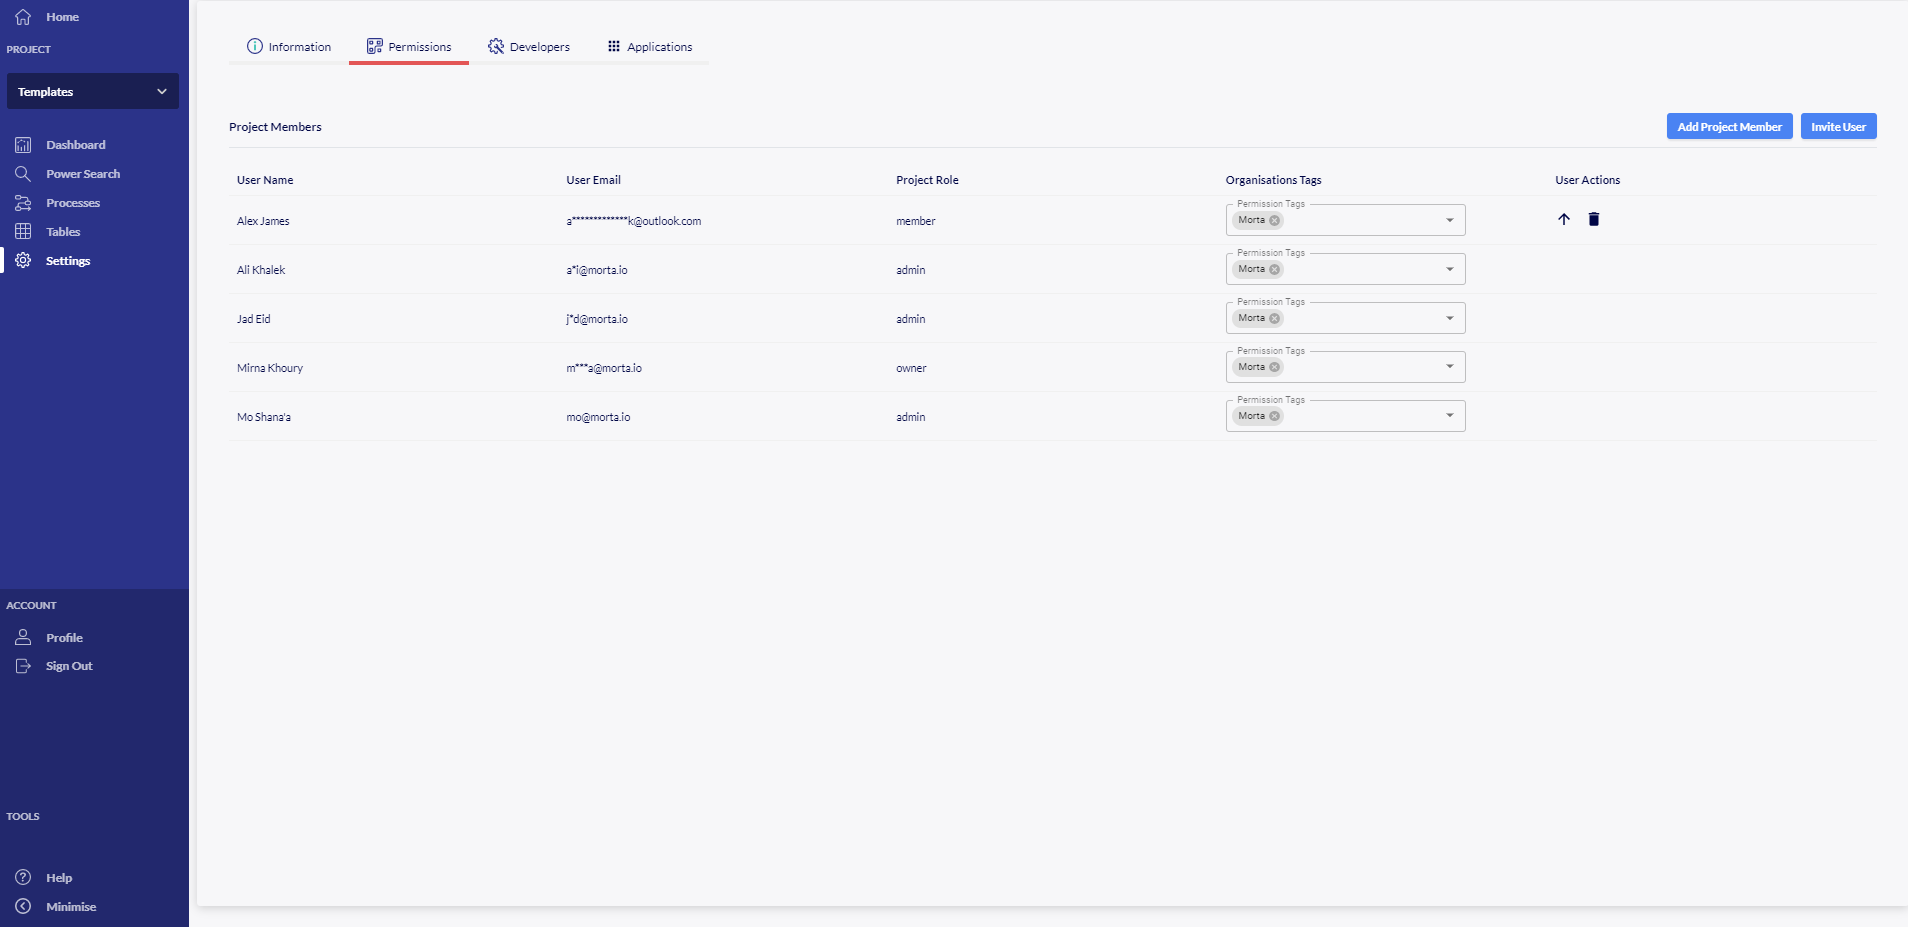
Fig 3: Morta settings & permissions page